When to Use Primer for Best Results | Painting Essentials
When to Use Primer for Best Results: The Ultimate Guide for Flawless Finishes
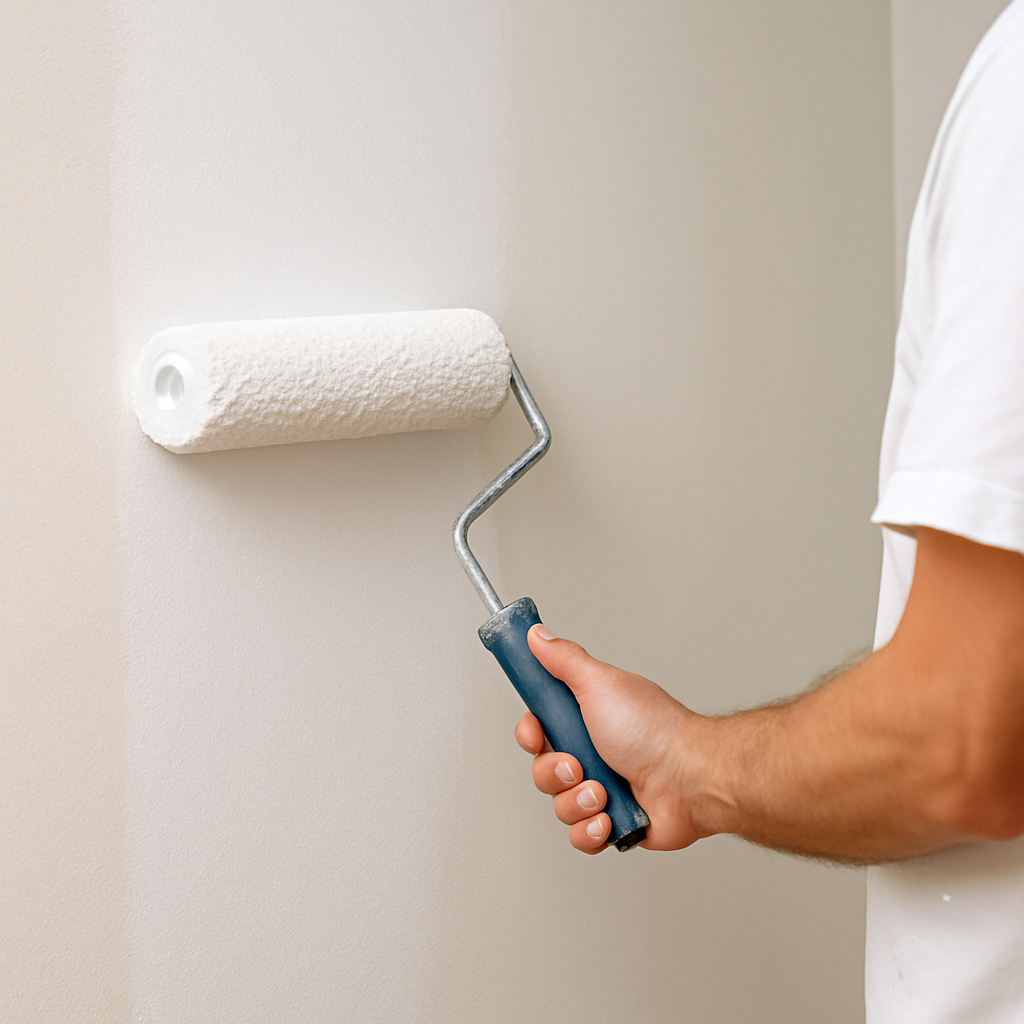
Primer is the essential foundation for a professional paint job.
Embarking on a painting project? Whether you’re refreshing a room or tackling a major renovation, the allure of vibrant new color is strong. But skipping a crucial step can lead to disappointment: failing to use primer when necessary. Often overlooked, primer is the unsung hero of painting, the essential foundation that ensures your final coat looks stunning and lasts for years. It’s not just an extra coat; it’s a problem solver.
Knowing exactly when to use primer separates amateur results from professional-grade finishes. It addresses underlying issues that paint alone simply can’t handle, saving you time, money, and frustration in the long run. This guide delves deep into the specific scenarios where primer is not just recommended, but essential for achieving optimal adhesion, coverage, durability, and appearance.
Understanding the Role of Primer: More Than Just Paint Prep
Before diving into the ‘when,’ let’s clarify the ‘why.’ What exactly does primer do? Unlike topcoat paint, which is formulated primarily for color and sheen, primer is engineered for performance. Its main functions include:
- Promoting Adhesion: Primer creates a stable surface that paint can grip onto effectively, preventing peeling, blistering, and chipping, especially on tricky surfaces.
- Sealing Porous Surfaces: Materials like new drywall, bare wood, and masonry soak up paint like a sponge. Primer seals these pores, ensuring the topcoat spreads evenly and requires fewer applications.
- Blocking Stains & Odors: Specialized primers act as barriers, preventing stubborn stains (water, smoke, tannins, markers) and odors from bleeding through the final paint color.
- Ensuring Color Uniformity: Primer provides a neutral, consistent base color, allowing your chosen paint color to appear richer, truer, and more vibrant, especially when making drastic color changes.
- Hiding Imperfections: While not a replacement for proper surface repair, some primers can help fill minor imperfections and create a smoother finish.
- Increasing Durability: By improving adhesion and creating a more robust paint system, primer contributes to a longer-lasting, more washable finish.
Think of it like applying makeup: you wouldn’t put foundation directly onto unprepared skin. Primer is the skin prep for your walls, ensuring everything that follows looks its best.
Scenario 1: Priming New Drywall or Plaster is Non-Negotiable
This is perhaps the most common and critical scenario for primer use. Freshly installed drywall (gypsum board) and plaster surfaces are highly porous and possess an inconsistent texture, particularly at the seams where joint compound (mud) has been applied.
Why Primer is Essential Here:
- Uneven Absorption: The paper facing of the drywall and the joint compound absorb paint at vastly different rates. Without primer, this leads to a blotchy appearance known as “flashing,” where seams and patches show through the topcoat with a different sheen or texture.
- Sealing Pores: A quality drywall primer (often PVA-based – Polyvinyl Acetate) sinks into the pores of the drywall and mud, sealing them effectively. This creates a uniform, non-porous surface ready for paint.
- Improved Coverage: By sealing the surface, primer prevents the expensive topcoat from being excessively absorbed, meaning you’ll use less paint to achieve full, even coverage.
- Enhanced Adhesion: Primer ensures the paint sticks securely to the entire surface, preventing future peeling issues.
Pro Tip: Don’t mistake regular wall paint for a drywall primer. Use a dedicated PVA or drywall primer/sealer designed specifically for this purpose. Allow it to dry completely according to the manufacturer’s instructions before painting.

Sealing new drywall with primer prevents blotchiness and ensures even color.
Scenario 2: Drastic Color Changes – Bridging the Gap
Planning to transform a deep burgundy room into a serene off-white? Or covering a bright yellow with a sophisticated navy blue? Painting directly over a dramatically different color is a recipe for multiple frustrating coats and potential color bleed-through.
How Primer Helps with Color Transitions:
- Neutral Base: Primer provides a neutral, opaque base (usually white, but can be tinted) that hides the underlying color effectively. This prevents the old hue from influencing the new one.
- Reduced Topcoats: By blocking the old color, primer significantly reduces the number of expensive topcoats needed to achieve the desired new shade. Often, one coat of primer and two topcoats suffice, whereas painting directly might require four or more topcoats.
- Truer Color Representation: With a neutral base, your chosen paint color will appear exactly as intended on the swatch, without being muddied or altered by the previous color.
Pro Tip: For significant color changes, consider using a tinted primer. Many paint stores can tint primer to a lighter shade of your final color (usually grey for dark topcoats, or a pastel version for light topcoats). This further enhances coverage and color accuracy.
Learn How to Choose the Perfect Paint Color
Scenario 3: Banishing Stains with Stain-Blocking Primers
Some blemishes are too stubborn for regular paint or even standard primers. Water stains from leaks, lingering smoke or nicotine discoloration, greasy marks, crayon or marker artistry, and tannin bleed from certain woods require the heavy-duty power of a specialized stain-blocking primer.
Types of Stains and Why Primer is Crucial:
- Water Stains: Often leave mineral deposits and discoloration that will leach through latex paint.
- Smoke/Nicotine Stains: Contain sticky residues and odors that penetrate surfaces and reappear over time.
- Tannin Bleed: Natural oils (tannins) in woods like cedar, redwood, and oak (especially knots) can migrate through paint, causing yellowish or brownish discoloration.
- Grease, Crayon, Marker, Ink: These substances can resist paint adhesion and bleed through multiple coats.
Stain-blocking primers come in various formulations (oil/alkyd-based, shellac-based, and advanced water-based options) designed to create an impermeable barrier. They lock the stain into the substrate, preventing it from migrating into your fresh paint job. Ensure the source of the stain (e.g., leak) is fixed before priming.
Recommendation: Shellac-based primers are often considered the most effective universal stain blockers, particularly for severe stains and odors, but oil-based and specialized water-based versions also perform well. Always clean the stained area as much as possible before priming.

Specialized primers permanently lock in stains that would otherwise ruin your paint job.
Find Top-Rated Stain-Blocking Primers
Scenario 4: Taming Porous or Chalky Surfaces
Exterior brick, concrete block, stucco, aged plaster, and old paint that has become chalky (rubs off as powder when touched) present unique challenges. These surfaces are either highly porous or lack the integrity needed for good paint adhesion.
Why Primer is Vital for These Substrates:
- Controlling Absorption (Porous): Like drywall, unsealed masonry (brick, concrete, stucco) drinks paint, leading to uneven coverage and wasted material. A masonry sealer or primer fills these pores.
- Binding Chalky Surfaces: Old, deteriorating paint loses its binding ability. Painting directly over it means your new paint is sticking to a weak, powdery layer destined to fail. A bonding or masonry primer penetrates the chalky residue, binding it together and creating a solid base for the new paint.
- Improving Adhesion: These surfaces often offer poor mechanical grip for paint. Primer creates a more receptive layer for the topcoat to adhere to, reducing the risk of peeling and flaking, especially crucial for exteriors exposed to weather.
- Preventing Efflorescence (Masonry): Primer can help block the migration of salts from within masonry that cause powdery white deposits (efflorescence) on the surface.
Preparation is Key: Before priming chalky surfaces, remove as much loose powder as possible by scraping, brushing, or power washing (allow to dry thoroughly). For masonry, ensure it’s clean and dry.
Scenario 5: Achieving Adhesion on Glossy or Slick Materials
Want to paint over old oil-based paint, high-gloss finishes, laminate cabinets, melamine furniture, ceramic tile, metal, glass, or PVC? These surfaces are notoriously difficult for standard water-based (latex) paints to stick to because they are non-porous and slick.
The Role of Bonding Primers:
- Creating a “Grip”: Bonding primers are specifically formulated with special resins that adhere tenaciously to hard-to-paint surfaces. They essentially create a microscopic profile that the topcoat can grab onto.
- Avoiding Peeling and Chipping: Without a bonding primer, paint applied to these surfaces is highly likely to scratch off easily, peel, or chip under minimal stress.
- Surface Transformation: They allow you to paint materials previously considered unpaintable, opening up vast possibilities for updates and renovations without costly replacement.
Crucial Step – Surface Prep: While bonding primers are powerful, results are significantly improved by proper surface preparation.
- Clean Thoroughly: Remove all grease, grime, soap scum, or dirt. Use an appropriate cleaner/degreaser.
- De-gloss/Sand Lightly: Scuffing the surface with fine-grit sandpaper (180-220 grit) or liquid de-glosser breaks the surface tension and gives the primer even more to bite into. Wipe away dust completely after sanding.
Applying a quality bonding primer after these steps ensures maximum adhesion and a durable finish.

Light sanding and a bonding primer are key to painting slick, glossy surfaces successfully.
Scenario 6: Seamless Repairs and Patchwork
You’ve diligently filled nail holes, stress cracks, or larger dents with spackle or joint compound. While the surface might look smooth, these repaired areas have different porosity and texture than the surrounding painted wall.
Why Spot-Priming Patches is Essential:
- Preventing Flashing: Just like new drywall mud, dried spackle and joint compound absorb paint differently than the existing wall surface. Painting directly over them will result in noticeable patches (“flashing”) where the sheen and sometimes even the color look different.
- Ensuring Uniformity: Applying primer specifically over the repaired area (and feathering it slightly onto the surrounding wall) seals the patch and makes its absorption rate match the rest of the wall.
- Invisible Blending: Once primed, the patch will accept the topcoat uniformly, blending seamlessly and becoming invisible in the final finish.
Tip: For small patches, a quick spot-prime is sufficient. For larger repaired areas, priming the entire wall might provide the most consistent finish, especially if the existing paint is old.
Scenario 7: Boosting Durability in High-Traffic Zones
Areas like hallways, entryways, kitchens, bathrooms, kids’ rooms, and commercial spaces endure significantly more wear and tear, scuffs, bumps, and cleaning than a quiet bedroom ceiling.
How Primer Enhances Longevity:
- Improved Adhesion Foundation: A well-primed surface provides the best possible start for paint adhesion, making the entire paint system more resistant to physical damage.
- Added Film Build: Some primers, particularly high-build primers, add thickness to the coating system, offering extra protection against scratches and scuffs.
- Enhanced Washability: When the topcoat is securely bonded thanks to primer, it can better withstand repeated cleaning without wearing away or becoming damaged.
While primer isn’t a substitute for choosing a durable topcoat finish (like satin, semi-gloss, or specialized scuff-resistant paints), using it underneath significantly contributes to the overall resilience and lifespan of the paint job in demanding environments.
When Might Primer Be Optional (Use Caution)?
Are there times you can skip primer? Possibly, but proceed with caution:
- Repainting Similar Color/Sheen: If you’re painting over an existing clean, sound, flat or matte latex paint job with a similar color, you *might* forgo primer. However, ensure the surface is impeccably clean.
- Using “Paint and Primer in One” Products: These products have improved but are generally best for situations where primer is already optional (like the point above). They typically don’t perform as well as separate primer/paint systems for genuinely problematic surfaces (stains, new drywall, glossy finishes). They are more accurately described as thicker paints with slightly better adhesion than standard paints, not true problem-solving primers.
General Rule: When in doubt, prime. The cost and time invested in priming are almost always less than dealing with paint failure later.
Get More Essential Painting Tips
Ready to Prime? Choosing the Right Type
Now that you understand when to use primer, selecting the correct *type* is crucial. Primers generally fall into these categories:
- Latex (Water-Based) Primers: Versatile, low VOC, fast-drying, easy cleanup. Good for drywall, masonry, and general-purpose priming. Includes PVA primers.
- Oil (Alkyd-Based) Primers: Excellent adhesion, good stain blocking (especially wood tannins), provide a smooth finish. Require mineral spirits for cleanup, slower drying, higher VOCs. Often best for bare wood, metals, and covering oil-based paints.
- Shellac-Based Primers: Ultimate stain and odor blockers. Adhere to almost anything. Very fast drying. High VOCs, require denatured alcohol for cleanup. Best for severe stains (smoke, water, knots) and sealing odors.
- Bonding Primers: Specialized water-based or oil-based formulas designed specifically for slick, hard-to-paint surfaces.
- Masonry Primers/Sealers: Formulated to penetrate and seal porous concrete, brick, and stucco, often alkali-resistant.
Always read the product label to ensure the primer is suitable for your specific surface and the problem you’re trying to solve.
Shop Top-Rated Primers for Your Project
Frequently Asked Questions (FAQ)
Do I absolutely NEED to use primer before painting?
While not always mandatory (e.g., repainting a similar color on a clean, matte wall), primer is crucial for many situations like new drywall, covering stains, drastic color changes, painting glossy surfaces, bare wood, and porous materials. It significantly improves adhesion, durability, and the final appearance, often saving you paint and effort in the long run.
Can I use regular wall paint as a primer?
Generally, no. Standard wall paint lacks the specific binders and sealers found in primers. It won’t adhere as well to challenging surfaces, seal stains effectively, or block porosity like a dedicated primer. While ‘paint-and-primer-in-one’ products exist, they often don’t perform as well as separate primer and paint coats, especially for problematic surfaces.
How long does primer need to dry before painting?
Drying times vary significantly based on the type of primer (latex, oil, shellac), temperature, and humidity. Always check the manufacturer’s instructions on the can. Latex primers typically dry to the touch in 30 minutes to an hour and can be recoated in 1-4 hours. Oil-based primers take longer, often requiring 6-24 hours before topcoating.
Conclusion: Prime for Painting Success
Understanding when to use primer is fundamental to achieving a paint job that not only looks fantastic but also stands the test of time. From sealing new drywall and blocking stubborn stains to ensuring adhesion on tricky surfaces and bridging drastic color changes, primer is the indispensable preparatory step that addresses underlying surface issues.
Don’t view priming as an optional chore; see it as an investment in the quality and longevity of your work. By identifying the scenarios outlined above and choosing the right product, you’ll ensure better adhesion, truer color, enhanced durability, and a truly professional finish every time.
Related Articles & Resources
- 10 Essential Painting Tips for Beginners
- How to Choose the Perfect Paint Color
- The Ultimate Guide to Painting Tools
Additional Resources:
For in-depth product guidance and technical specifications, consider visiting the websites of leading paint manufacturers: